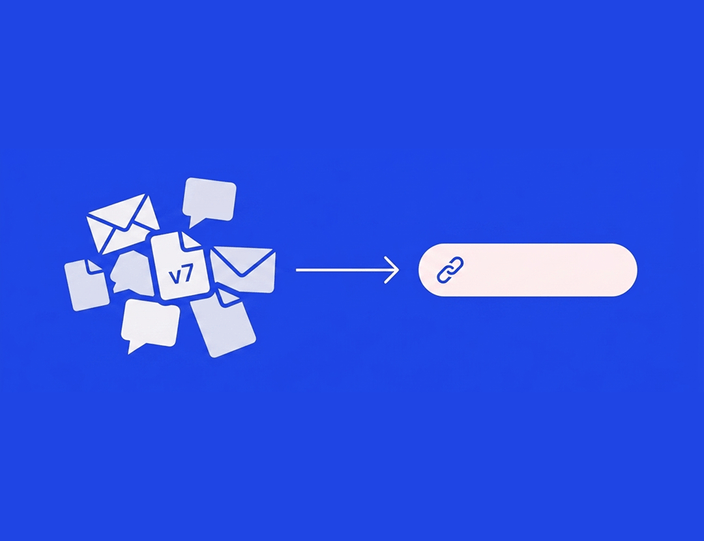
Tous les social media managers connaissent cette sensation : le post est prêt, l’échéance est pour demain, mais l’approbation est… quelque part. Peut-être dans la boîte de réception du client. Peut-être dans une discussion Slack ou même WhatsApp datant de mardi dernier. Peut-être approuvé oralement lors d’un appel que personne n’a noté. Le contenu est fini, mais le processus qui l’entoure bloque tout le reste.
Ce processus a un nom et une solution. Un véritable workflow d’approbation transforme l’attente passive en un système avec des statuts visibles, des approbateurs désignés, des deadlines réelles et des rappels automatiques. C’est l’amélioration opérationnelle la plus efficace que la plupart des équipes sociales puissent mettre en place, et tu peux l’installer en un après-midi.
Ce guide t’accompagne à travers tout le processus : ce qu’est réellement un workflow d’approbation, les étapes par lesquelles les posts doivent passer, comment attribuer les rôles, trois templates par type d’équipe, et la réponse honnête à la question sous-jacente : comment arrêter de courir après les approbations ?
Qu’est-ce qu’un workflow d’approbation sur les réseaux sociaux ?
Un workflow d’approbation sur les réseaux sociaux est le chemin défini qu’un post parcourt du premier draft jusqu’à sa publication : qui l’examine, dans quel ordre, avec quelle autorité et dans quel délai. C’est ce qui fait la différence entre « je l’ai envoyé au client, j’attends son retour » et « c’est en révision client, attendu pour jeudi, rappel envoyé mercredi ».
Le mot workflow est crucial. Beaucoup d’équipes ont une habitude d’approbation : quelqu’un jette généralement un œil aux posts avant qu’ils ne sortent, souvent l’account manager, généralement via email ou Slack. Cela fonctionne jusqu’au jour où ça ne fonctionne plus. Un post est publié avec un ancien prix, un client assure n’avoir jamais vu la caption qu’il a pourtant validée, ou un lancement échoue parce que la validation est restée bloquée dans la boîte de réception de quelqu’un pendant un long week-end.
Un workflow remplace le « généralement » par un système. Chaque post possède :
- Des étapes définies par lesquelles il doit passer (sans pouvoir les sauter)
- Un seul approbateur désigné par étape (une personne, pas un département)
- Une deadline par étape, avec des rappels automatiques en cas de retard
- Une source unique de vérité pour les versions et les feedbacks
- Un historique de qui a approuvé quoi, et quand
Si tu étudies d’abord l’aspect logiciel, notre aperçu de ce qu’un outil d’approbation des réseaux sociaux doit faire couvre l’aspect technique. Ce guide se concentre sur le processus lui-même, car un outil sans processus sous-jacent ne fait qu’automatiser le chaos.

Petite nuance importante, car les termes sont souvent confondus : ton processus d’approbation est la politique (« les clients valident tous les posts sponsorisés »), et ton workflow d’approbation est la séquence opérationnelle qui l’applique (« les posts payants passent par une révision interne, puis sont envoyés à Dana chez le client, avec un SLA de 48h et un rappel auto à 24h »). Tu as besoin des deux. La plupart des équipes n’ont que le premier.
Pourquoi les approbations par email et tableur échouent
Soyons honnêtes : l’email et les tableurs conviennent à certaines équipes. Si tu es seul à gérer une marque avec une seule partie prenante qui répond en un jour, une feuille partagée et un thread d’emails hebdomadaire feront l’affaire. Ne laisse personne te vendre une plateforme de workflow pour un problème que tu n’as pas.
Les difficultés commencent avec le volume et se multiplient avec le nombre d’intervenants. Voici le scénario classique que l’on voit chaque semaine sur les forums d’agences :
- Le feedback se fragmente. Le client répond à l’email, puis ajoute un détail sur WhatsApp, puis son brand manager commente dans le tableur. Trois canaux, trois avis partiels, un designer perdu.
- Les versions dérivent. La caption dans le tableur est en v3. L’image dans l’email est en v2. Ce qui est publié est un mélange des deux. Personne ne s’en rend compte avant la mise en ligne.
- L’approbation est invisible. Un « Ça me va ! » dans un thread d’emails — cela couvre-t-il le texte, le visuel et la date de publication ? Pour un seul post ou pour les douze ? Quand le client conteste plus tard, tu passes des heures à faire de l’archéologie dans des mois de discussions.
- Tu deviens le système de rappel. Chaque approbation qui traîne nécessite une relance humaine, et cet humain, c’est toi. Le suivi n’est plus une tâche ; c’est devenu un job à temps plein que personne n’a demandé.
Ce temps perdu est bien réel. Des recherches du McKinsey Global Institute montrent que les professionnels passent environ 28 % de leur semaine de travail à lire et répondre aux emails (McKinsey Global Institute, « The social economy »). La relance des approbations représente une part énorme de ce gâteau pour les équipes social media, et contrairement à la création, rien de tout cela n’est facturable ni n’améliore le contenu.
La solution n’est pas un meilleur modèle d’email. C’est de déplacer les approbations vers une structure où le statut est visible, les versions sont uniques et les rappels s’envoient d’eux-mêmes. Ce qui nous amène aux étapes.
Les 6 étapes d’un workflow d’approbation social media

Toutes les équipes n’ont pas besoin des six étapes — les templates plus bas montrent lesquelles supprimer. Mais la séquence complète ressemble à ceci :
Étape 1 : Le Brief
Quelqu’un définit l’objectif du post : campagne, plateforme, message clé, éléments obligatoires (mentions légales, tags, liens) et date de publication. Un brief flou est la cause numéro un des révisions inutiles. Si tes allers-retours dépassent régulièrement les deux tours, regarde d’abord ton brief, pas ton designer.
Étape 2 : Le Draft
Le créateur produit le post : texte, visuel, lien, heure de publication souhaitée. La règle d’or ici : rédige là où tu fais approuver. Si le contenu est rédigé dans un doc, approuvé par email et programmé dans un troisième outil, tu provoques volontairement des erreurs de version.
Étape 3 : La révision interne
Un collègue ou un responsable vérifie le post avant que le client ou la partie prenante externe ne le voie. Cette étape permet d’éliminer les fautes d’orthographe, les erreurs de ton, les liens morts ou les mauvais formats. Ainsi, l’attention du client se porte sur la stratégie et l’image de marque, pas sur la correction orthographique.
Étape 4 : La révision client (ou partie prenante)
Le décideur externe voit le post tel qu’il apparaîtra réellement — un aperçu direct du feed Instagram ou de la carte LinkedIn — et soit l’approuve, soit le renvoie avec des commentaires. Deux règles clés pour cette étape :

- Un seul approbateur. Si trois personnes chez le client peuvent commenter, une seule doit détenir le bouton de validation. Les comités commentent ; les individus approuvent.
- Une deadline par défaut. « Merci de valider d’ici jeudi soir ; les posts sans réponse seront escaladés » — ou, pour certaines équipes, auto-approuvés pour le contenu evergreen.
Si le post est rejeté, il revient à l’étape Draft avec les commentaires, et le workflow doit comptabiliser ce cycle. Le nombre de révisions par post est l’indicateur de santé le plus utile de ton processus.
Étape 5 : Approuvé
Le post est verrouillé. Le texte, le visuel et la date sont figés, et l’approbation est enregistrée : qui, quand, quelle version. Cet historique est ton journal d’audit ; c’est ce qui règle la discussion « on n’a jamais validé ça » en trente secondes.
Étape 6 : Programmé / Publié
Le post approuvé entre dans la file d’attente de publication. Dans un outil connecté, c’est automatique : l’approbation fait passer le post en mode programmé sans étape de copier-coller. Cela élimine l’anxiété du soir : « est-ce que c’est bien parti ? »
C’est toute cette séquence qui transforme la publication d’un acte de foi en une simple checklist. Pour voir comment les approbations s’intègrent dans la collaboration globale, consulte notre aperçu des outils de collaboration social media.
Comment construire ton workflow d’approbation, étape par étape
Tu peux mettre cela en place en un après-midi. Voici la marche à suivre, dans l’ordre — et l’ordre est important, car la plupart des équipes commencent par l’étape 5 (choisir un outil) et se demandent ensuite pourquoi le logiciel n’a rien résolu.
Étape 1 : Identifie tes étapes réelles
Pars du risque, pas de l’ambition. Demande-toi : quel est le pire contenu qui puisse être publié si personne ne vérifie ? Une faute de frappe ? Une étape de révision interne suffit. L’image de marque du client endommagée ? Ajoute une révision client. Une amende réglementaire ? Ajoute une validation juridique. Chaque étape coûte environ une journée de délai, alors ajoute des étapes pour limiter les risques, pas pour flatter les hiérarchies. Personne n’a besoin que le CTO approuve un meme pour le mardi.
Étape 2 : Désigne un approbateur par étape
Inscris des noms réels, pas des rôles théoriques : « Révision interne : Marta. Révision client : Dana chez [Client]. » Désigne ensuite un remplaçant pour chaque, car Marta prend des vacances. Dès qu’une étape a deux approbateurs égaux, chacun suppose que l’autre l’a fait. Si deux personnes doivent vraiment donner leur avis, fais de l’une une réviseuse (peut commenter) et de l’autre une approbatrice (peut valider).
Étape 3 : Fixe une deadline par étape – et mets-toi d’accord oralement
Une demande d’approbation sans date limite est une simple suggestion. Fixe un SLA (délai de réponse) par étape : 24h pour l’interne et 48h pour le client est un standard raisonnable. Puis — c’est l’étape que tout le monde oublie — demande au client d’accepter ce délai par écrit lors de l’onboarding. Présente-le comme une protection de leur qualité de contenu.

Étape 4 : Décide de l’escalade et du statut par défaut
Que se passe-t-il quand le délai est dépassé ? Choisis une option :
- Escalade : le post notifie un second contact chez le client.
- Auto-approbation evergreen : le contenu à faible risque est publié comme prévu ; les contenus de campagne ou payants ne s’auto-publient jamais.
- Mise en attente : le post est mis en pause et apparaît dans l’email de statut hebdomadaire sous « en attente de votre retour ».
Étape 5 : Centralise drafts, feedbacks et approbations
Maintenant seulement, choisis ton outil. Il doit permettre de voir les statuts, restreindre les droits de validation, offrir de vrais aperçus, centraliser les retours, envoyer des rappels automatiques et horodater les approbations. Cela peut être un outil dédié — notre comparatif des outils d’approbation en analyse huit — ou un tableau de bord rigoureusement tenu.
Étape 6 : Active l’automatisation des rappels
Chaque rappel envoyé par un humain use un peu la relation ; chaque rappel envoyé par un système est neutre. Configure trois alertes : une notification à l’entrée en file d’attente, un rappel à mi-échéance, et l’escalade une fois la deadline passée. Arrête de relancer manuellement. C’est ici que tu gagnes en sérénité.
Étape 7 : Teste pendant deux semaines, puis mesure deux chiffres
Ne change pas tout dès le premier jour. Analyse ensuite :
- Le délai moyen d’approbation par étape. Où les posts stagnent-ils ? Si la révision client prend 4 jours au lieu de 48h, c’est un sujet de discussion client, pas un problème d’outil.
- Le nombre de révisions par post. La normale se situe entre une et deux. Trois ou plus signifie que tes briefs sont vagues ou que ta révision interne est bâclée.
Rôles et permissions : qui fait quoi
Les workflows d’approbation échouent quand tout le monde peut tout faire. La solution : séparer ce que chaque rôle peut voir, commenter et approuver. Voici la matrice standard pour un workflow en agence :
| Rôle | Profil type | Créer/Modifier | Commenter | Approuver | Visibilité |
|---|---|---|---|---|---|
| Créateur | SMM, designer | Oui | Oui | Non | Ses marques assignées |
| Approbateur interne | Team lead, AM | Oui | Oui | Étape interne seulement | Marques de l’équipe |
| Réviseur client | Équipe marketing client | Non | Oui | Non | Sa marque, aperçus uniquement |
| Approbateur client | Décideur désigné | Non | Oui | Étape client seulement | Sa marque, aperçus uniquement |
| Admin | Dirigeant d’agence | Oui | Oui | Forçage (tracé) | Tout |
Trois principes clés :
Les réviseurs commentent ; les approbateurs approuvent. Le comité côté client peut laisser tous les feedbacks qu’il souhaite, mais la validation finale repose sur une seule personne. C’est le remède structurel contre la « création par comité ».
Les clients voient les aperçus, pas les coulisses. Un client ne doit voir que le rendu final — pas tes notes internes, tes autres clients ou tes brouillons. Des workspaces séparés par client sont indispensables, surtout en agence. Notre guide sur la gestion des réseaux sociaux pour les agences détaille cette configuration.

Des forçages administrateur existent, mais ils sont tracés. Quelqu’un doit pouvoir valider un post urgent en cas d’urgence, mais l’historique doit l’indiquer pour éviter que cela ne devienne une habitude.
3 templates de workflow d’approbation à copier
Adapte le template à ton niveau de risque. Voici le comparatif :
| Template 1 : 2 étapes | Template 2 : 3 étapes | Template 3 : 4 étapes | |
|---|---|---|---|
| Idéal pour | Équipes in-house, SMM solo | Agences avec validation client | Secteurs réglementés (finance, santé) |
| Étapes | Draft, Interne, Publication | Draft, Interne, Client, Publication | Draft, Interne, Légal, Client, Publication |
| SLA de révision | 24h interne | 24h interne, 48h client | 24h int., 48h légal, 48h client |
| Rappels auto | Optionnel | Essentiel | Essentiel |
Template 1 : Les deux étapes (In-house et solo)
Draft, révision interne, publication. Un créateur, un approbateur, SLA de 24h. Les posts evergreen s’auto-approuvent s’il n’y a pas de réponse ; les campagnes attendent. C’est léger, car le but est simplement d’avoir un deuxième regard pour éviter les coquilles sans alourdir le calendrier.
Template 2 : Les trois étapes (Agences – Le standard)
Draft, révision interne, révision client, publication. La révision interne protège ta crédibilité ; l’approbation client protège la relation. SLA : 24h interne, 48h client, rappel à mi-parcours. Un seul approbateur client désigné par marque — à inscrire dans le contrat.
Template 3 : Les quatre étapes (Secteurs réglementés)
Draft, interne, légal/compliance, client, publication. Pour la finance ou la santé, la validation juridique a sa propre étape avant le client, pour s’assurer qu’un changement légal n’annule pas une validation client. L’historique d’audit est ici obligatoire. Planifie tes contenus deux semaines à l’avance.
Comment arrêter de courir après les clients
Voici un changement de perspective : un client qui ne valide pas à temps n’est pas forcément un client difficile — c’est quelqu’un à qui on a demandé de travailler dans un système qui n’est pas le sien. Rends la validation plus facile que l’inaction.
Cinq astuces à fort impact :
1. Supprime la connexion. Chaque identifiant est un obstacle. Utilise des liens de révision sans login : le client clique, voit l’aperçu réel sur son téléphone et valide d’un tap.
2. Pense mobile. Ta cliente valide souvent entre deux réunions ou dans les transports. Si l’expérience nécessite un ordinateur, tu perds des créneaux précieux.
3. Regroupe par semaine. Une session de révision de douze posts tous les jeudis vaut mieux que douze interruptions par semaine. Ça crée un rythme d’approbation.
4. Laisse le système relancer. Les rappels automatisés enlèvent le poids émotionnel. Toi et le client êtes du même côté, scrutant la même deadline système.
5. Fixe les règles par défaut dès le début. Précise dès l’onboarding que les posts evergreen sont publiés par défaut après 48h sans retour, tandis que les campagnes attendent toujours un « oui » explicite. Cela protège son calendrier et le tien.
Le suivi de version : la fin du « final_v2_DEFINITIF »
Le suivi de version dans un workflow signifie trois choses :
- Un seul objet post. Le texte, le visuel et la date vivent ensemble. On modifie le post, pas une copie de copie.
- Un historique visible. Chaque modification est horodatée. Si un post a fait quatre allers-retours, l’historique le montre, et tu peux en chercher la cause.
- L’approbation liée à une version précise. Si quelqu’un modifie le post après validation, l’approbation est cassée et le post repart en révision. Ainsi, la version approuvée est forcément celle publiée.
Outils pour gérer vos workflows d’approbation
1. Planable – pour la collaboration visuelle
Planable est réputé pour ses aperçus fidèles et ses commentaires fluides. Les types d’approbation évoluent avec les forfaits.
Le point faible : les coûts sont par workspace, ce qui peut vite grimper pour une agence multi-clients.
2. Kontentino – pour le workflow interne-client
Kontentino a été conçu précisément autour de ce workflow :
- Approbation en deux étapes : sépare l’interne du client sur tous les plans.
- Liens clients sans login : validation en un clic, approbateurs clients illimités et gratuits.
- Rappels auto et escalades : le système gère le suivi.
Idéal pour : les agences qui veulent arrêter de courir après les validations et centraliser tout au même endroit. Commence ton essai gratuit de 14 jours.
Checklist de ton workflow d’approbation
- Étapes calculées selon le risque
- Un approbateur nommé par étape (+ un remplaçant)
- SLA par étape (ex: 24h interne / 48h client)
- Accord sur les conséquences d’un retard dès l’onboarding
- Lieu unique pour le draft et l’approbation
- Rappels automatisés activés
FAQ
Quelle est la différence entre processus et workflow ?
Le processus est la règle politique (« le client doit valider »). Le workflow est l’exécution concrète de cette règle (les étapes, les outils, les deadlines).
Combien d’étapes d’approbation faut-il ?
Aussi peu que possible. 2 pour l’interne, 3 pour les agences, 4 pour les secteurs à risque (légal).
Installe le workflow une fois, gagne du temps pour toujours
Tout ce guide se résume à une chose : un après-midi de paramétrage pour ne plus jamais avoir à te demander où en est un post. Simplifie ton organisation, gagne en clarté, et laisse les outils faire le travail de relance à ta place.